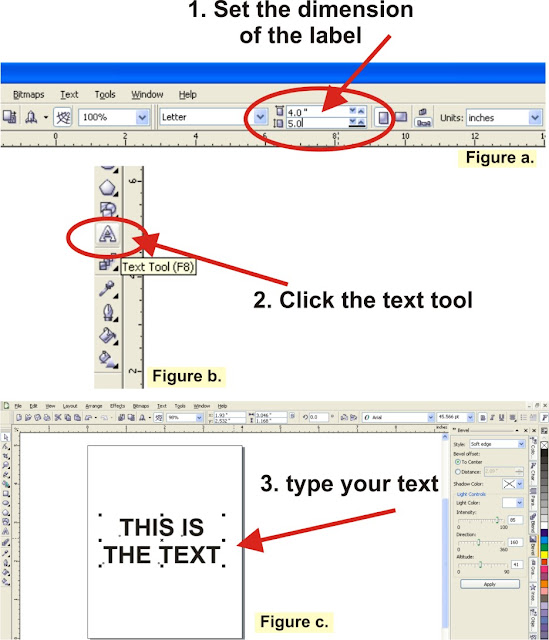
2. Set the label’s dimension on the menu bar. (See figure a.)
3. Click the text tool on the left. (Figure b.)
4. Type your text and drag its position on the label (Figure c.).
5. Click your text and see the font list on the upper menu bar and select your font style (Figure d.).
6. Edit the color of the text on the color palette located at the right side (Figure e.)
7. Using the rectangle tool and other tools located on the left side, you can add designs on your layout. (Figure f.)


1 comment:
good work...keep it up Corel Draw X3
Post a Comment