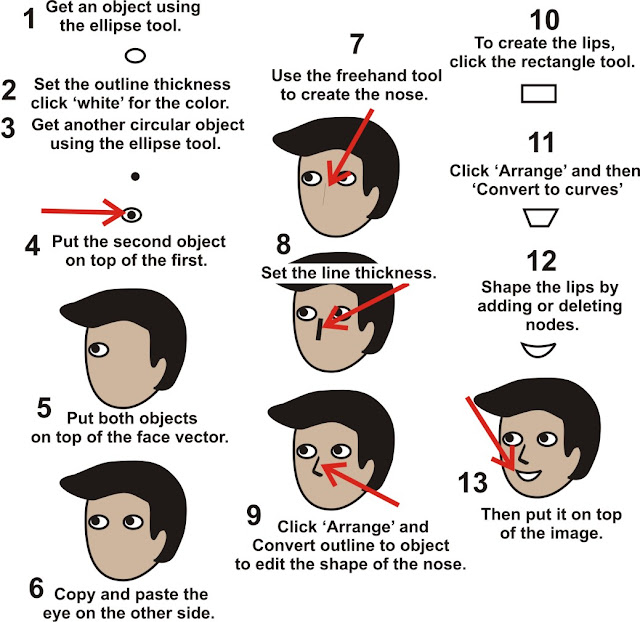
To complete the final part of the previous tutorial, here are the procedures.
1. To create the eye, get an object using the ellipse tool.
2. Set the outline thickness and choose ‘white’ in the color palette.
3. Get another circular object using the ellipse tool. Add the desired color for the eye ball.
4. Put the second object on top of the first object for the eye.
5. Then put both objects on top of the previous image created from the previous tutorial.
6. Select both objects and click copy located at the upper left menu bar. (See Figure 1)
7. Paste the copied objects on the other side of the eye.
8. To create the nose, use the freehand tool on the left side (See Figure 2).
9. Drag the line from top to bottom.
10. Determine the line thickness.
11. Click ‘Arrange’ (upper menu bar) and Convert outline to object.
12. The line is now ready for editing. Nodes can be added or deleted to shape the line.
13. To create the lips, click the rectangle tool.
14. Again determine the outline thickness.
15. Click ‘Arrange’ and then ‘Convert to curves’
16. Create the lips by adding or deleting some nodes and shaping its sides.
17. Add color using the color palette.
18. Again, put it on top of the previous image.
19. There you have the simple cartoon face of a man.


No comments:
Post a Comment